Shopify and Facebook are ever-changing ecosystems. Considering how beneficial Facebook is for Shopify Store owners, one cannot undermine the importance of Pixel – Facebook’s proprietary tracking tool for websites.
Pixel enables Shopify store owners to monitor how the visitors are interacting and navigating on their store. These interactions are called events, which play a very important role in analytics and also while launching marketing campaigns.
2021 saw huge changes adopted by Facebook for Pixel in response to the privacy-oriented changes offered by Apple’s IOS 14.
Considering that, we have put together some easy steps that will enable you to set up Facebook Pixel on your Shopify Store in just a few minutes.
Please note that this blog post will be updated and edits will be marked in case of any new changes launched by Facebook regarding the Pixel Installation.
Table of Contents
Step 1 – Set up Facebook Pixel ID
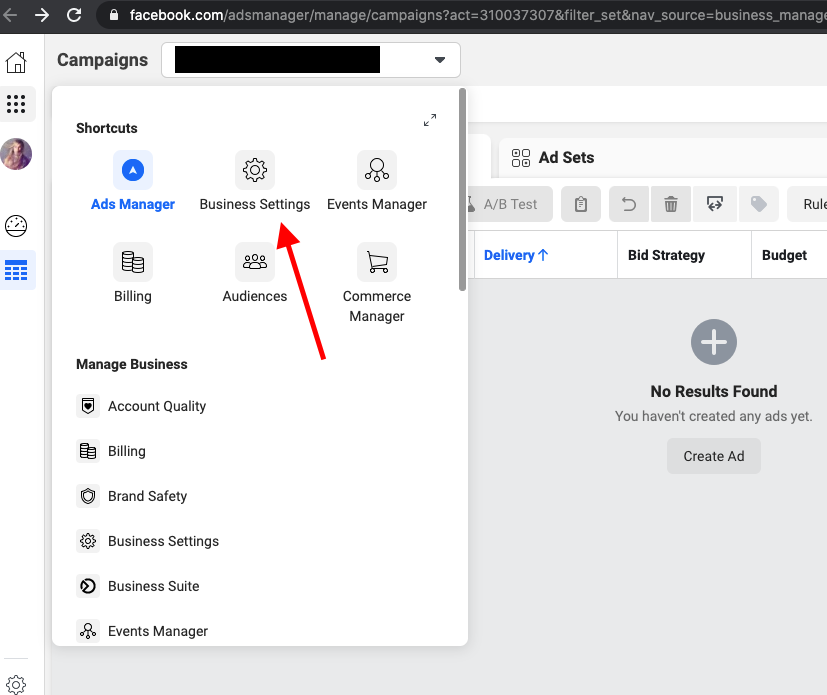
Open Facebook Ads Manager and open the drop-down menu (2nd in Top Corner left). From the menu options click on ‘business settings’.
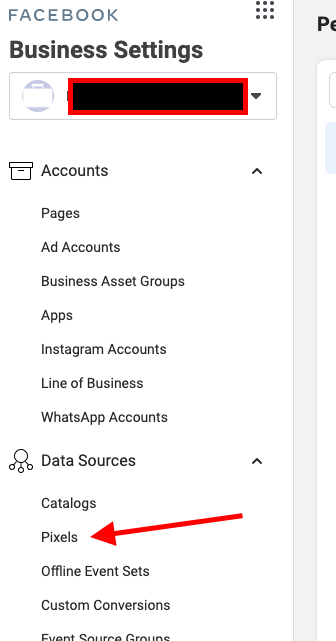
Click on to ‘Data Sources’ dropdown and you will see ‘Pixels’.
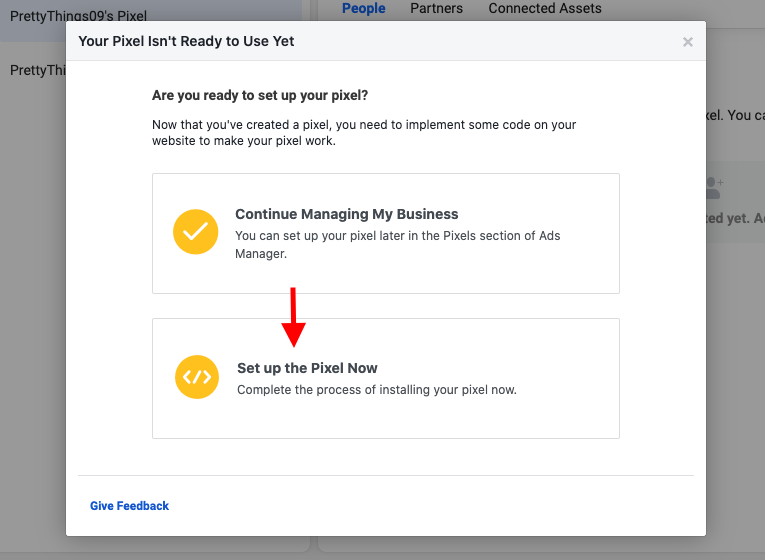
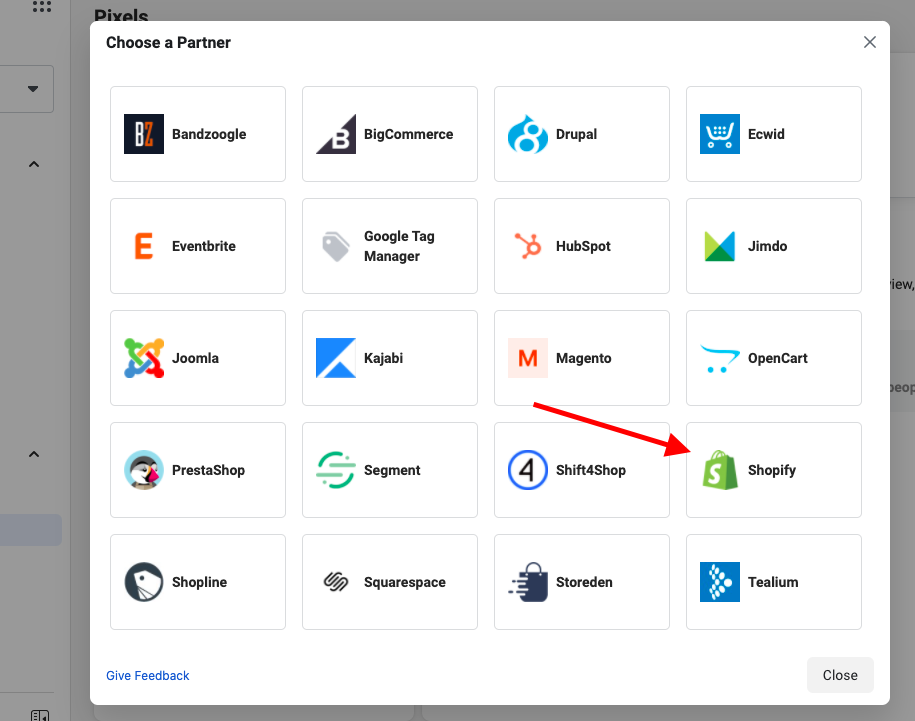
If you do not have Pixels setup, you can simply click on the ‘Add’ button and a pop-up window will open like this.

On the next step, select ‘set up the Pixel now’.
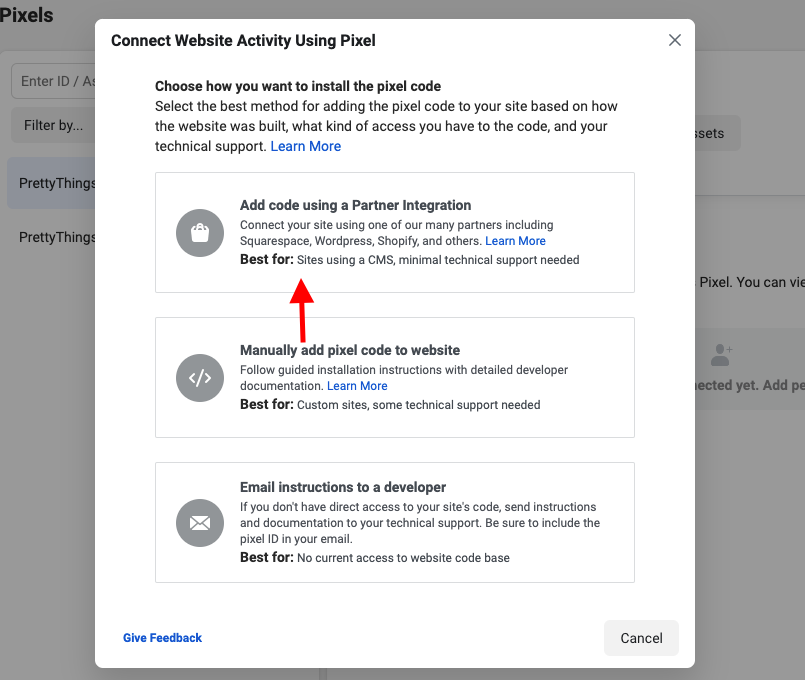
Next, select the platform of integration i.e. Shopify.
Step 2 – Paste ID on your Shopify store
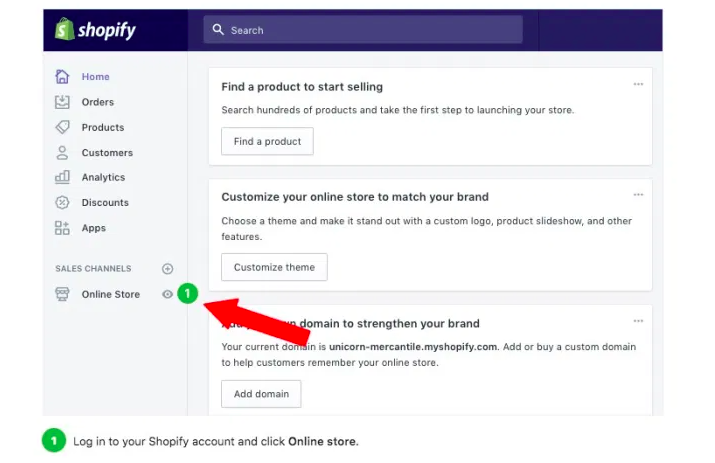
Now login into your Shopify store. And go to ‘online store’.
Select ‘preferences’ and then copy-paste the pixel id.
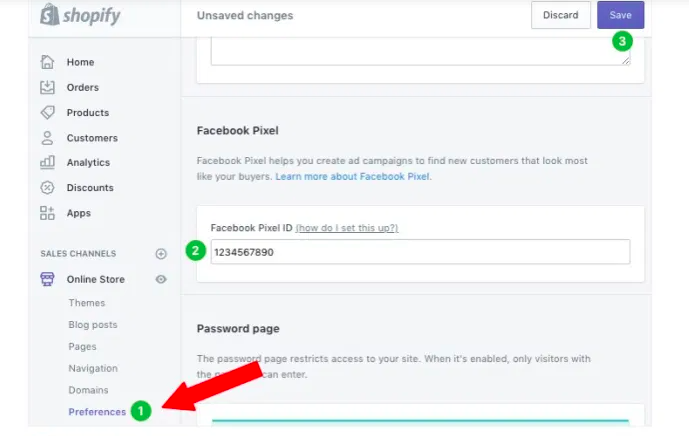
Hit ‘save’.
Step 3 – Check the status of your Pixel on Facebook
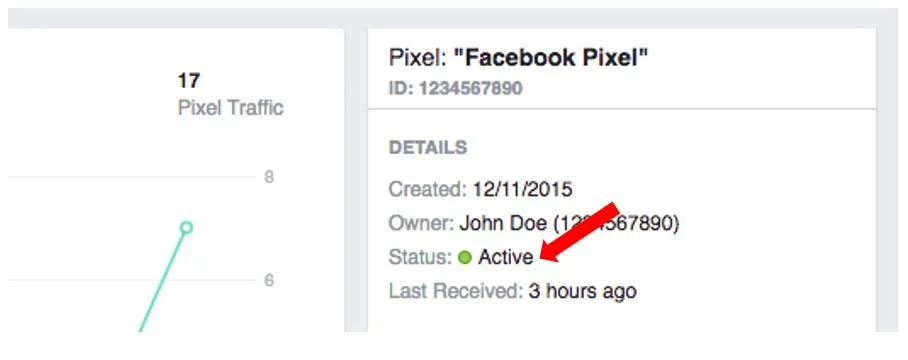
Don’t forget to check the status of your Facebook Pixel. If the status is ‘active’ you are good to go but if it says ‘ no activity yet’, it may take up to 20 minutes for changes to reflect.
What if my Facebook Pixel ID doesn’t work?
Use Facebook Pixel Helper Chrome Extension for troubleshooting your Facebook Pixel issues.
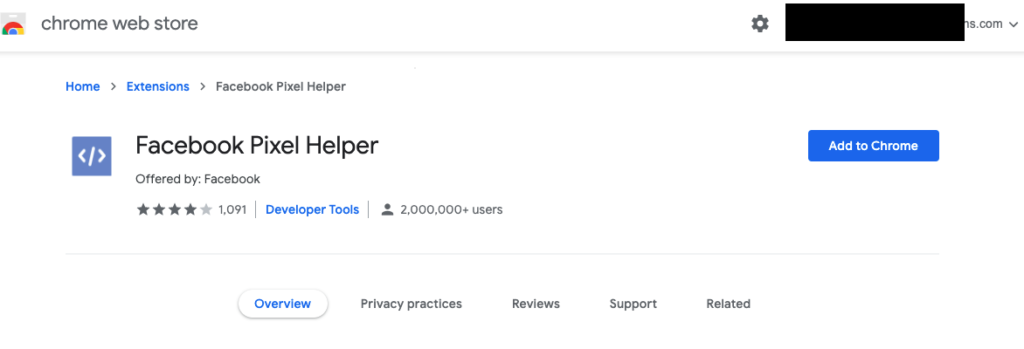
Just ‘Add to Chrome’ and you will see this added to your Chrome bar.
Next, move on to your Shopify store, click the extension icon and it will diagnose your pixel installation.
The following screenshot shows that pixel installation was successful and the website events are being tracked.

Stay tuned to the further updates in this blog post as we will be covering ‘how to edit the default events as well as setup custom events for Facebook pixel on your Shopify store.


