Sub-collections or collections within collections organize site structure where child categories/collections are nested into the primary/parent category/collection.
Collections and tags are used for managing and filtering the products and a great way for sorting similar products under one group. Tags help in further sorting of the product by using key terms. As a result, the shopping experience of an online user becomes faster which means more sales.
One of the bottlenecks of the Shopify platform is that it does not make it easier for online merchants to add/create sub collections. There is not a good resource which could be of help and mostly merchants end up buying plugins / 3rd party apps.
Here, we will guide you step by step and make adding Shopify collections within collections much easier.
Do you know?
Shopify allows you to create up to 5000 automated collections.
In this blog post, we will share one of the easiest ways to add Shopify sub-collections within collections.
Table of Contents
What is sub-collection?
Sub-collections are subcategories of parent categories or collections. They help online user in filtering the products of their choice. In Shopify, mostly themes support adding sub-collections as it helps users in finding the right product without spending much of a time.
Adding Shopify collections within collections via products page
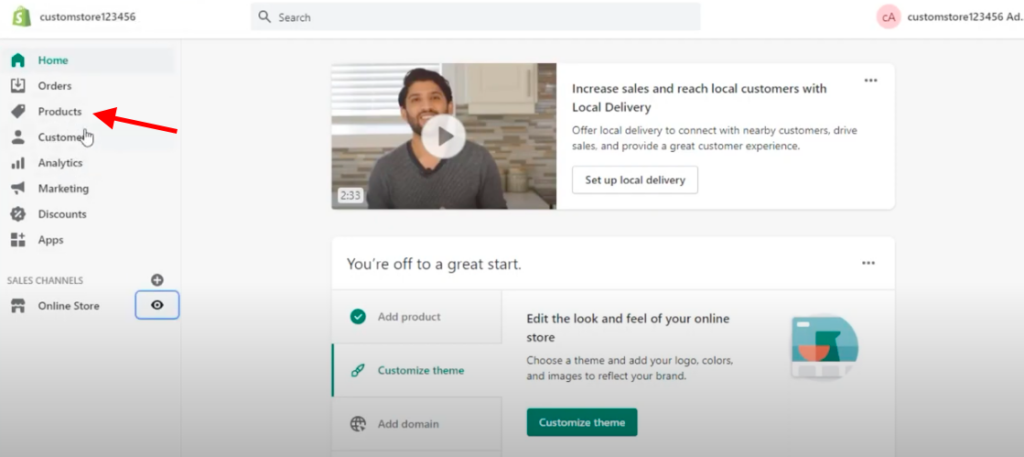
Login and go to the admin panel. Click ‘products’ and go inside the ‘collections’ on the left hand side menu.
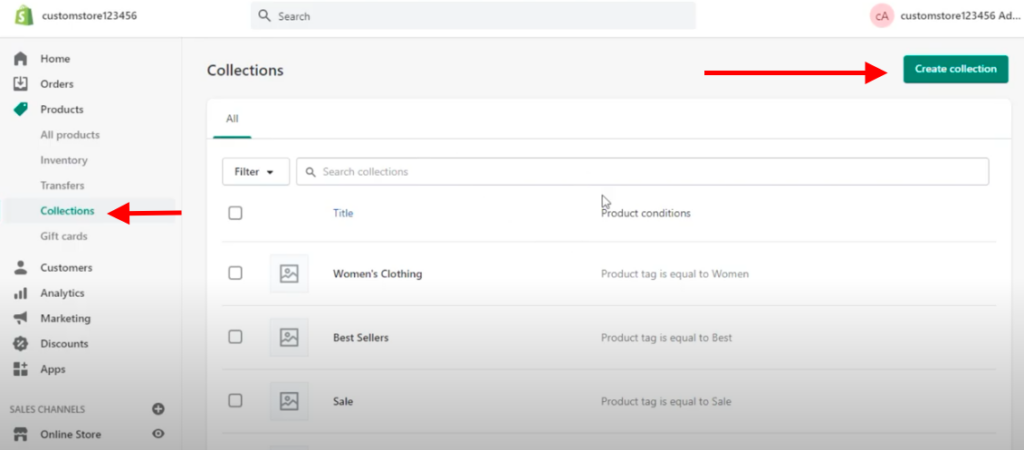
After opening ‘collections’, you will see a button ‘create collection’ on the top right side of the screen. Parent collections are already added as you can see i.e. women clothing, best sellers, sale etc.
Press ‘create collection’ for adding sub-collections.
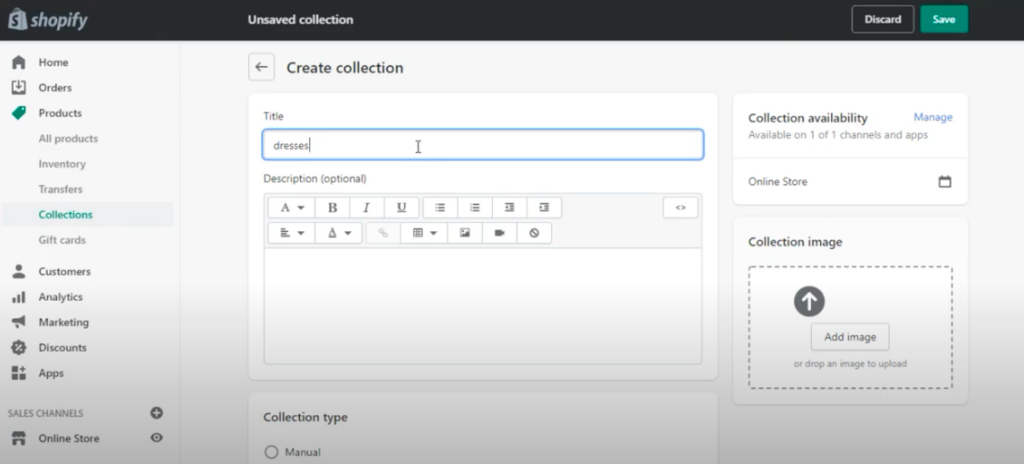
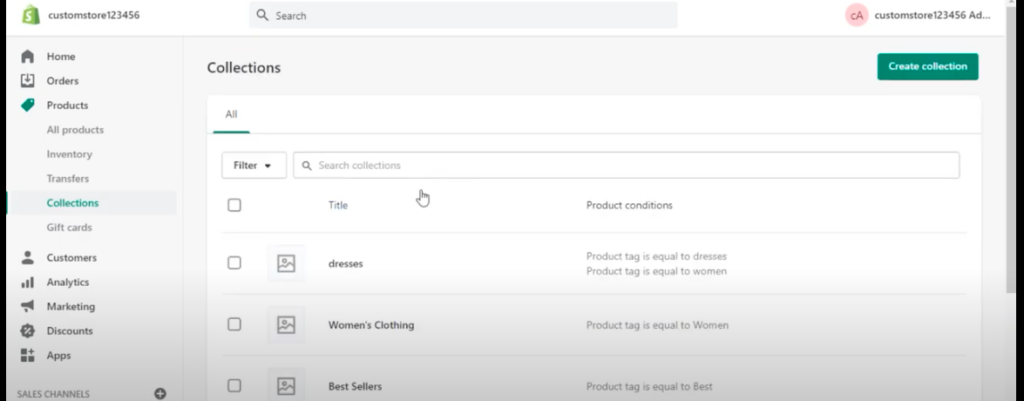
Now let’s say you want to add ‘dresses’ sub-collection. Type ‘dresses’ in the title and pick a tag. We are using the same terms ‘dresses’ and ‘women’ as you have to choose relevant ones. Make sure ‘automated is checked. In the end, hit ‘Save’ button given on the top right.
As you can see in the above screenshot that ‘dresses’ is added as a parent category and we want it under ‘women clothing’.
Refresh your ‘online store’ and go to ‘navigation’ under the ‘online store’ on the left side of the screen.

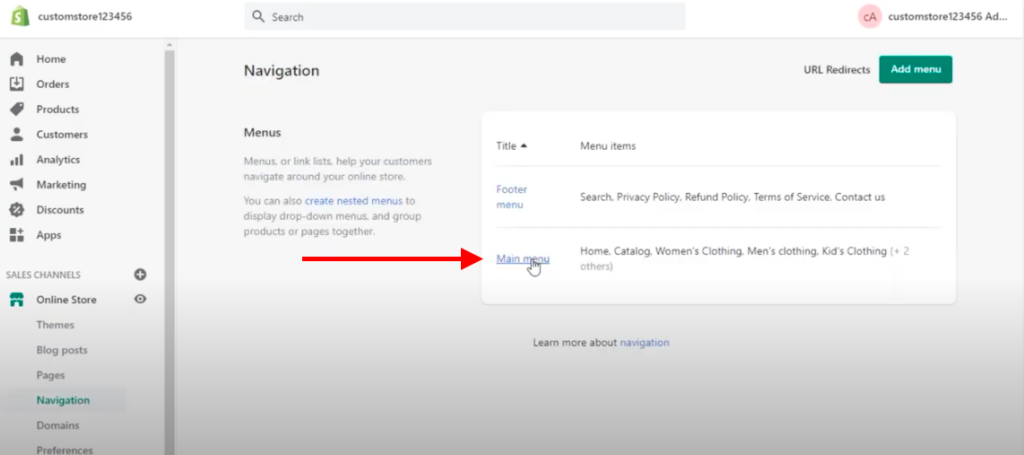
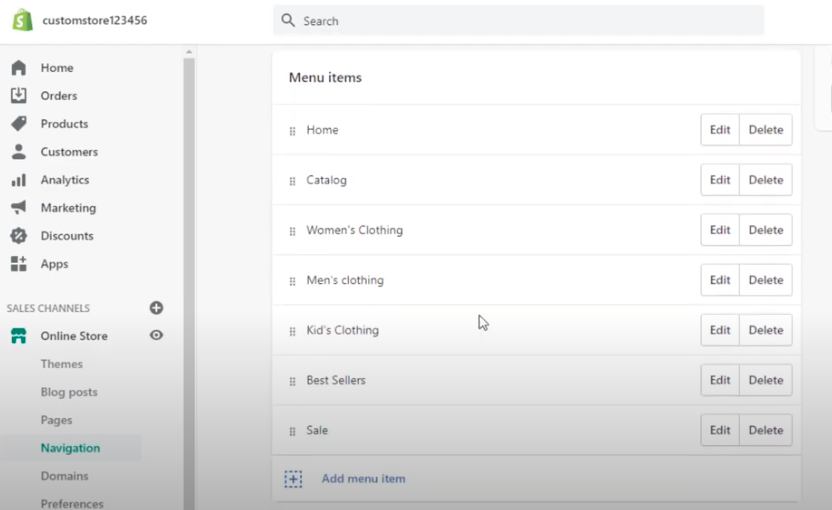
Select ‘main menu’ and ‘add menu item’ as shown in the above screens. After clicking on ‘add menu item’ a popup window will appear from where you have to select ‘collections’ and then select the sub-collection you added above i.e. ‘dresses’.

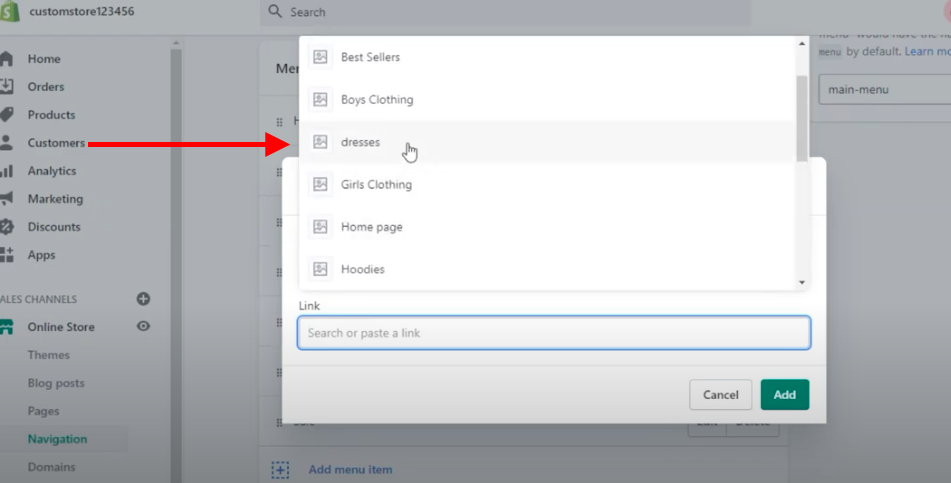
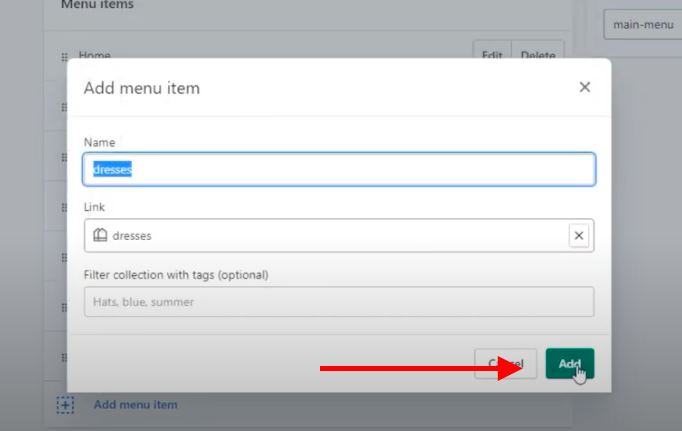
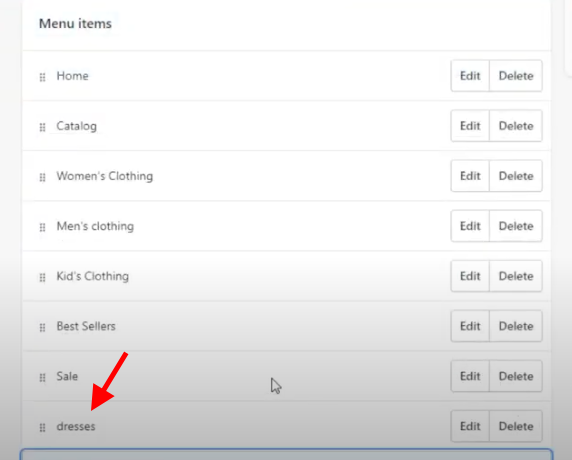
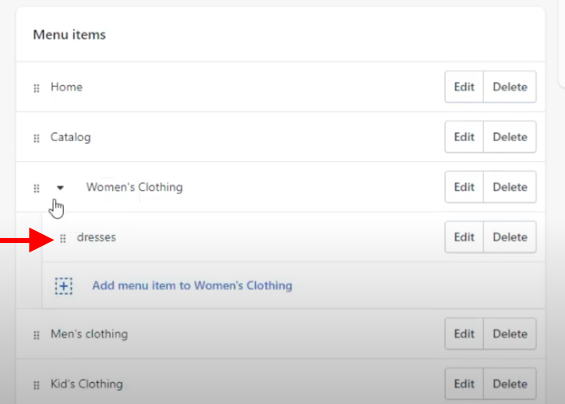
After adding ‘dresses’, you just need to drag and drop ‘dresses’ under ‘women clothing’ which is our parent collection. Save changes.
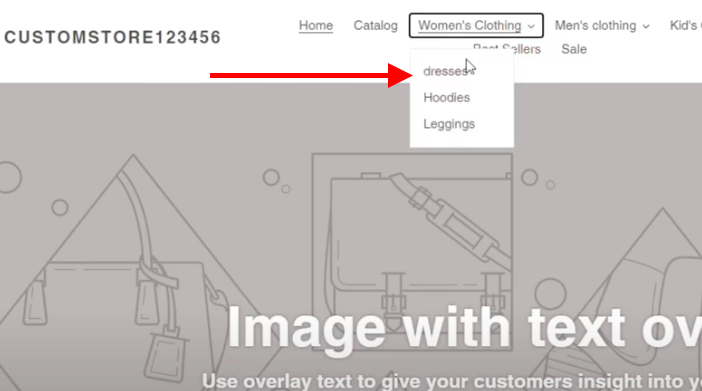
Now go to your online store and refresh the page to see if the collection is appearing. As you can see, ‘dresses’ sub-collection is under ‘women’s clothing’.
Adding Shopify collections within collections via navigation menu
First and the simplest way of adding sub-collections is via the navigation menu. Login and make changes in your admin panel. After login, go to ‘navigation’ in the left menu.
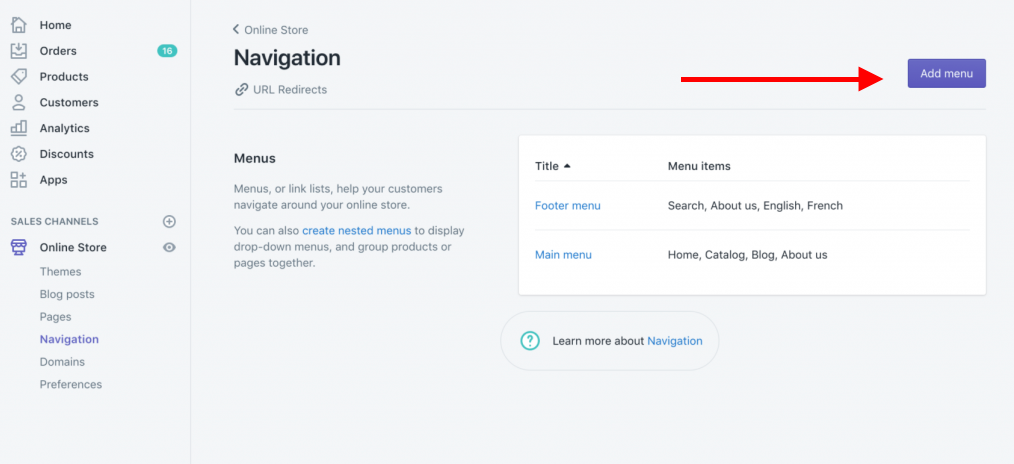
‘Add menu’ if you don’t have it already. If you already have the menu, just skip the step.
After adding menu, add menu items/collections.

In our case, collection 1 and collection 2.
After adding the menu item just drag and drop under the collection you want to add.
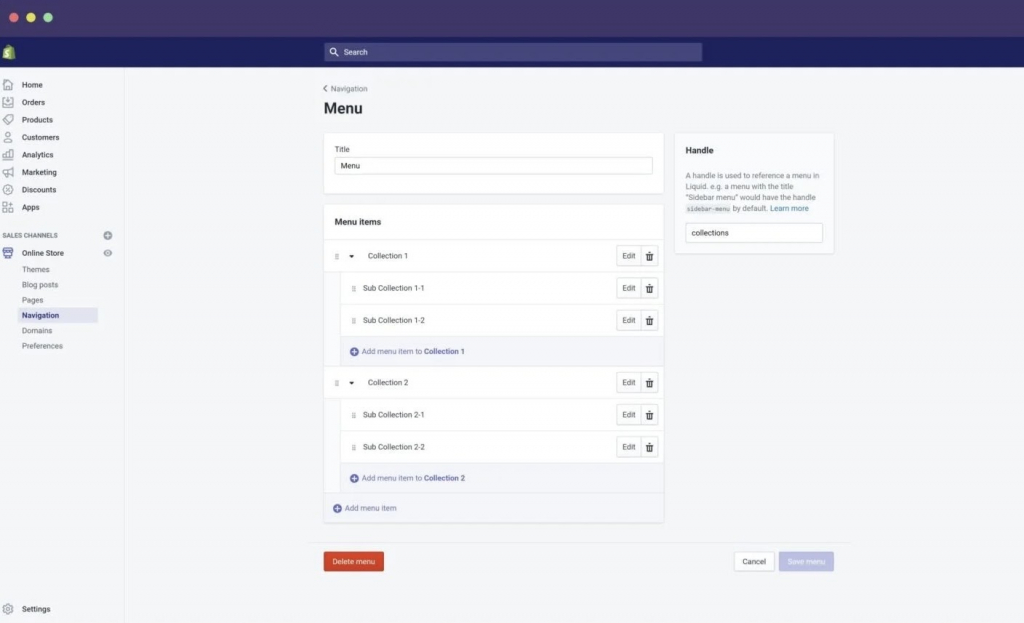
After adding all the sub-collections, hit ‘save menu’.
Learn More: Clarity & Strategy with a Discovery Workshop
Final verdict
Make sure your theme supports adding sub-collections. Although most of the Shopify themes support and adding subcategories/collections is not a daunting task rather it takes few clicks or can say few minutes. You may find other variety of ways of adding Shopify collections within collections but what we find easy is shared here.
Phaedra Solutions develops and manages ecommerce storefronts for businesses like yours, and empowers them with technical and digital solutions
We believe anyone can dominate an ecommerce niche, product, segment or category with the right set of skills , product research, and technical setup .
Get in touch with us to learn how we can do this for you.


