When it comes to the primary navigation menu in your website’s header, it’s important to make sure your Shopify store menu and categories are clear to understand.
To supplement this, having a Shopify menu with images can be a great source for increasing the conversion rate and decreasing bounce rate. Here’s why →
A good navigation menu with images can help customers find what they are looking for quickly and efficiently.
It’s a common fact that websites only have a few seconds to grab the attention of online customers. So you better guide them to the information right away.
In this blog post, we will share simple tips on how to set up Shopify menu with images in your online store.
Table of Contents
Key Takeaways
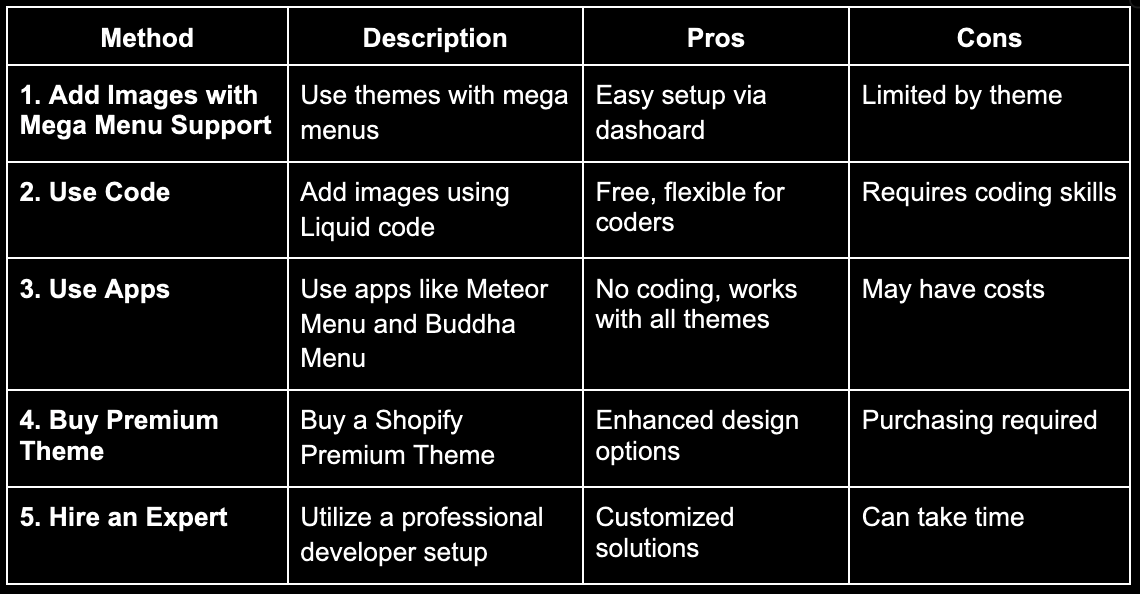
- You can add images to your Shopify theme with Mega Menu Support.
- Images can be added to your Shopify theme using Code.
- Applications such as the Meteor Mega Menu App and the Buddha Mega Menu App can be used to add images to Shopify's Mega Menu.
- You can make your Shopify images stand out by purchasing a designed Shopify theme.
- Hiring an expert to set up a Shopify menu with images is the easiest way and is highly recommended.
What is a Mega Menu in Shopify?
A mega menu in Shopify is a big menu that shows many links at once.
It helps shoppers find what they need faster. Instead of a small dropdown, it opens wide with categories, images, and sections.
Stores use it to organize products neatly. It makes shopping easier and quicker!
1. Add Images to Shopify Theme with Mega Menu Support
If you have a theme that supports multiple mega menus, it’s best to add associated images with each product/collection so that they easily show up in the navigation menu.
Associate Images with Products/Collections
Wondering how to associate images with your collections/products on Shopify?
1- Open the Shopify dashboard.
2- Press ‘products’ and go to ‘collections’.
3- Pick the collection you want the image from.
4- Upload the image on the right.

To associate images with the products on Shopify:
1- Select ‘products’> ‘all products’
2- Choose the product you want to attach the image to.
3- Navigate to the Images section and onto the Add images tab.

Add products/collections to Menu
1- Open the Shopify dashboard.
2- Go to ‘online store’> ‘navigation’.
3- Choose the menu you want images for.
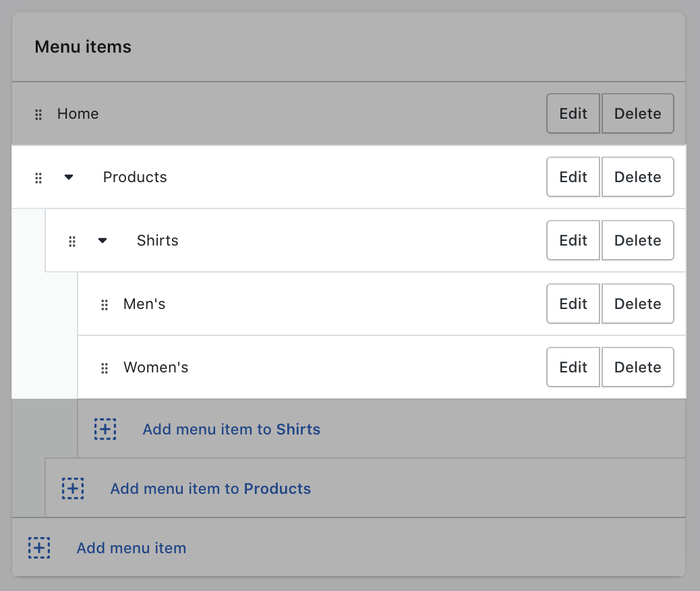
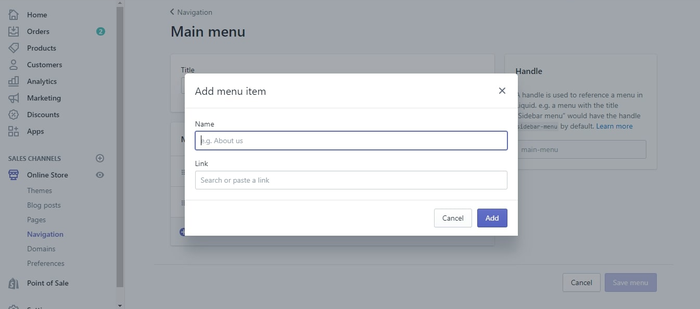
4- Click Add menu item.
5- Add ‘name/title’ and ‘link’ to the product or collection you want. Hit add.
6- Click ‘Save menu’.
Images would start reflecting in the mega menu.
If you want to customize your navigation menus further, you need to edit the theme editor and modify the code. Scared of getting things wrong? Hire an Expert Shopify Developer for professional assistance.
2. Use Code to Add Images to Shopify Mega Menu
You can customize anything (even images) on your Shopify store using code. This is because Shopify is built on the Liquid template language.
With basic coding skills, you can easily add images to the Shopify menu, and it's completely free.
So, how can you add images to the Mega Menu using Shopify Code? Just copy and paste the code below and directly add images to your Shopify menu:
<ul class="mega-menu">
  <li class="menu-item">
    <a href="/collections/collection-name">Collection Name</a>
    <div class="mega-menu-content">
      <!-- Text Links -->
      <div class="menu-links">
        <a href="/collections/collection-name/product-1">Product 1</a>
        <a href="/collections/collection-name/product-2">Product 2</a>
        <a href="/collections/collection-name/product-3">Product 3</a>
      </div>

      <!-- Image -->
      <div class="menu-image">
        <a href="/collections/collection-name">
          <img src="{{ 'image-filename.jpg' | asset_url }}" alt="Collection Image">
        </a>
      </div>
    </div>
  </li>
</ul>
Upload your image to Shopify via Settings > Files and copy the filename. Replace the placeholder filename in your code with this actual filename, then save your changes and preview the site to see the images in the mega menu.
3. Add Images to Shopify Mega Menu by using Apps
Shopify offers over 8000 apps that allow you to customize your store the way you want.
While several such applications are available on the Shopify App Store that help you add images, we’re going to look at ‘Meteor Mega Menu’ and ‘Buddha Mega Menu’ in particular.
Meteor Mega Menu and Navigation
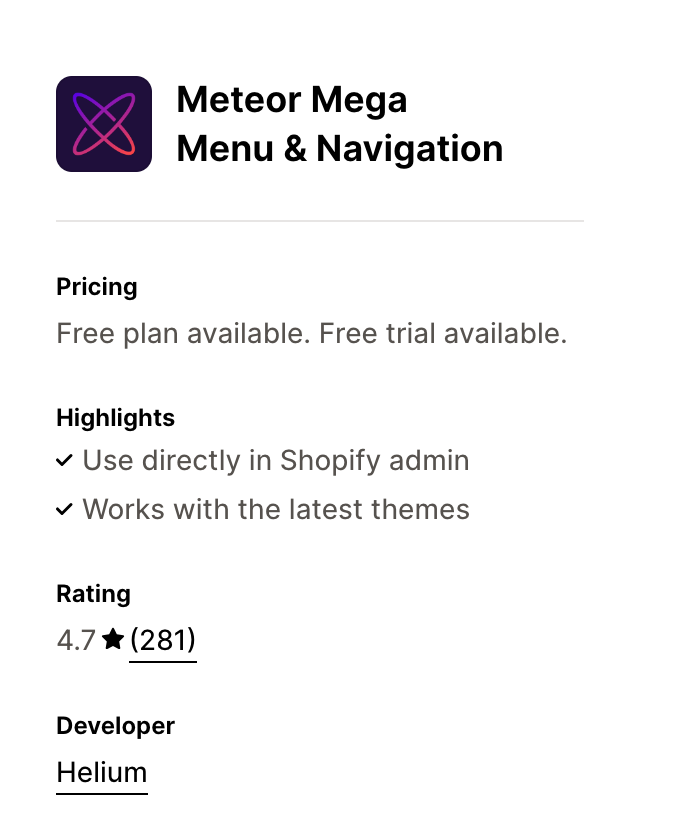
Meteor mega menu app is not just ideal for adding images but it helps in transforming Shopify's main menu and drop-down menus.
It also has some pre-built templates.
The biggest plus of using the Meteor mega menu app is that it works with all Shopify themes (ICON, DAWN, etc.). You can have a dropdown menu with images no matter what theme you are using for your Shopify store.
Buddha Mega Menu and Navigation

Buddha Mega Menu app assists you in designing your dashboard within seconds.
The standout feature of this app is that it doesn’t require creating menus in Shopify Navigation, and there’s no coding either.
Using the Buddha Mega Menu app, you can showcase your products with pictures as well as eye-catching features (like countdown sales). And the best part is - this app is compatible with all Shopify themes.
4. Purchase a Designed Shopify Premium Theme
The purpose of adding images to your Shopify Mega Menu is to make it stand out and help customers get a visual idea of what you’re selling.
One of the best ways to do that is by purchasing a Shopify-designed premium theme.
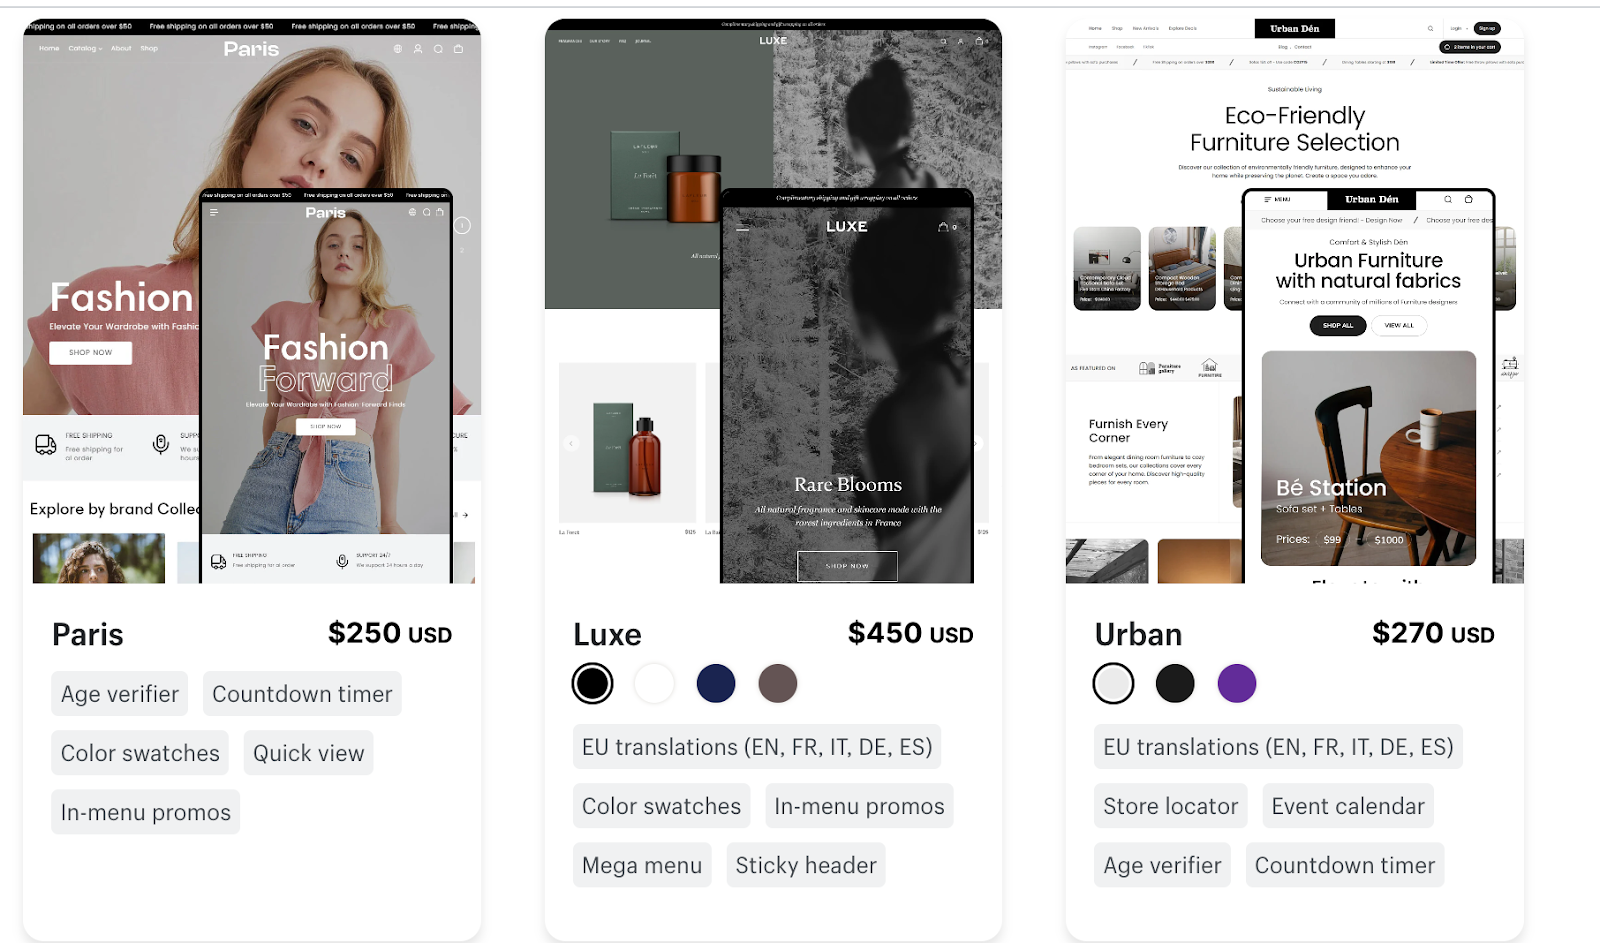
While the free Shopify themes may be functional, they are often found lacking in their design elements (particularly regarding images).
The best way to solve this would be to purchase a designed premium theme as it offers more variation, enhanced customization, and a richer customer experience.
5. Hire an Expert to Setup Shopify Menu with Images
Do all the above solutions seem like too much work? You can always hire a Shopify expert to help.
At Phaedra Solutions, we help both successful and striving entrepreneurs develop their dream e-commerce store.
Our team of highly-trained developers aims to optimize your sales and ensure your Shopify store never goes out of style! Get in touch with us to learn about why we are the best fit for your Ecommerce dreams.
Example: Product Image Displayed in the ‘ICON Theme’ Dropdown Menu
To show you how to display product images in the Shopify menu, we took the ‘ICON theme’ as an example.
This is a very simple setup often overlooked or missed by online merchants.
If your theme has a dropdown menu, it will show in the theme settings. For now, let’s explore this in the ICON theme.
Here’s the dashboard showing the dropdown menu.

From the Shopify dashboard, go to Sales channels > Online Store > Navigation.

Click on the main menu as highlighted in the above screenshot. After opening the ‘Main menu’, you will see ‘Shop’ with a drop down.
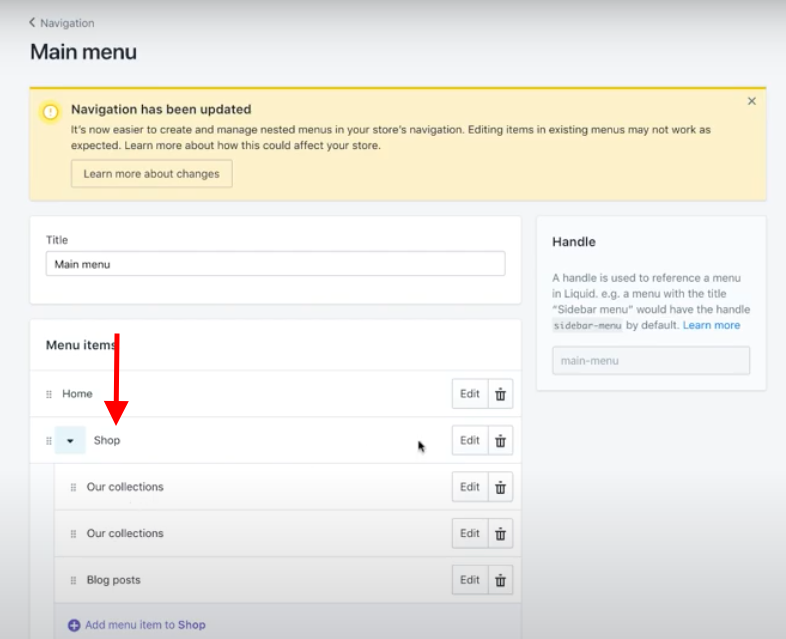
Press the ‘edit’ button given next to ‘Shop’. And this window will open.
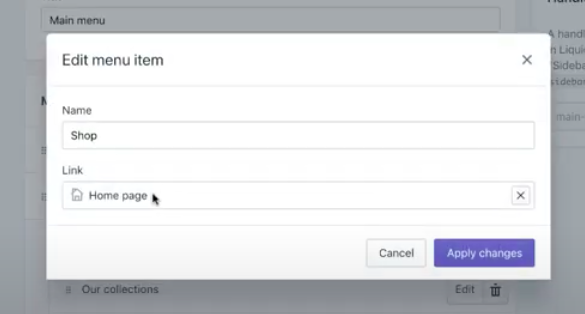
In the link field, remove the auto-select from the cross button. Choose the ‘collection’ you want images from to display next to product names in the menu.
Remember, it cannot be a product or an old collection. Once done, click save.
Go to the custom theme settings of your store to check if the images are displaying.
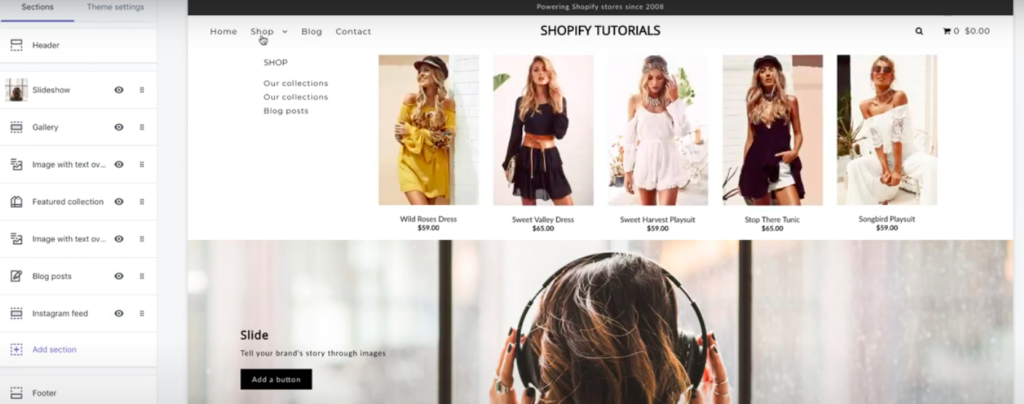
Here we can see the images displayed.
Final Verdict
Setting up Shopify Mega Menu with images isn’t just a fancy upgrade. It’s a powerful tool to enhance user experience.
These images will guide your customers through your store with a visually appealing menu that showcases your products at a glance.
This not only makes shopping more intuitive but also keeps visitors engaged longer, increasing the likelihood of sales.
So, dive into the world of visual menus and give your Shopify store the makeover it deserves. Happy selling!
Confused or need an expert to do the tweaks for you? Get a custom solution from Phaedra Solution’s Shopify expert.


