
Salesforce integration with Shopify helps in synchronization of orders, and customers. When an order is placed on Shopify, it would automatically create on Salesforce, this means tracking data is much easier.
Without even a single line of code, you can integrate Salesforce with Shopify in minutes as there are a number of tools/apps available in the market, for example, Zapier, Automate.io etc.
The best thing about Zapier and Automate.io is that they have prepared popular workflows or can say ready-made templates for common use cases.
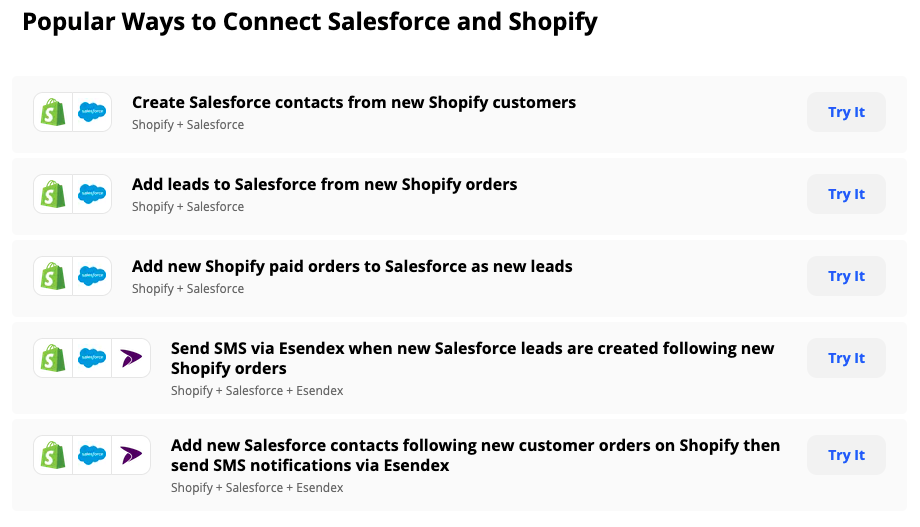
In this blog post, we will be covering ‘add leads to Salesforce from new Shopify orders’. Although, there are other popular ‘how to integrate Salesforce with Shopify’ ways and you can always check them by going to the above mentioned tools.
So you want to add new Shopify orders to Salesforce as leads but do you have the time to add them every time you receive an order? Follow the below mentioned steps.
Table of Contents
Add your Shopify and Salesforce accounts
First go to automate.io and select the method you want integration for.
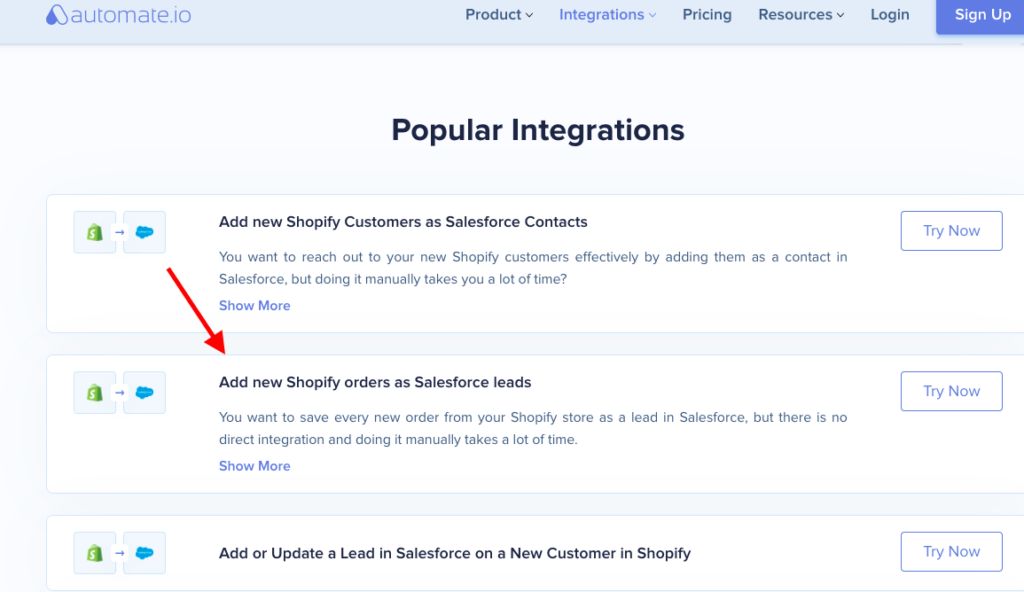
Hit ‘try now’. A screen with three steps will appear. First step is adding accounts. ‘Connect’ your Shopify store.
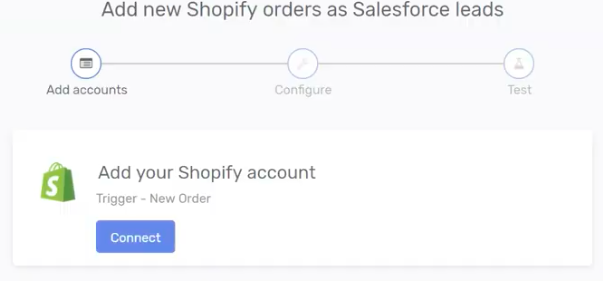
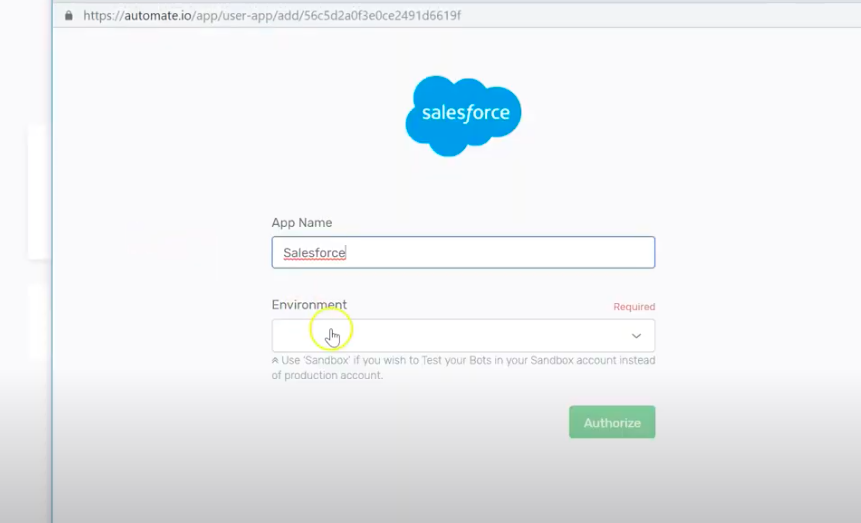
After adding app name and store name, press ‘authorize’.
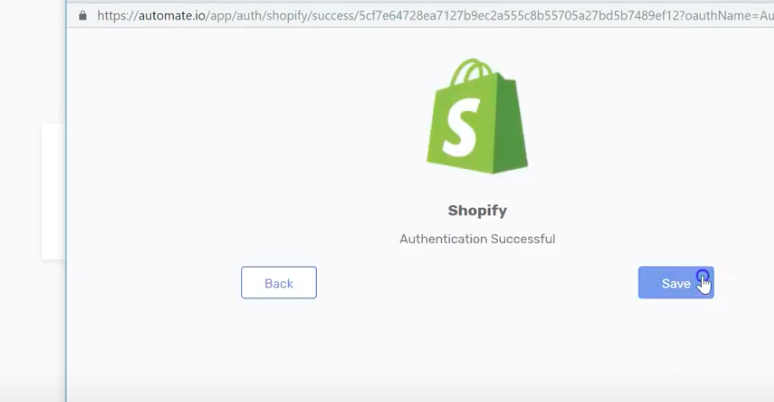
After adding a Shopify store, now it’s time to add a Salesforce account.
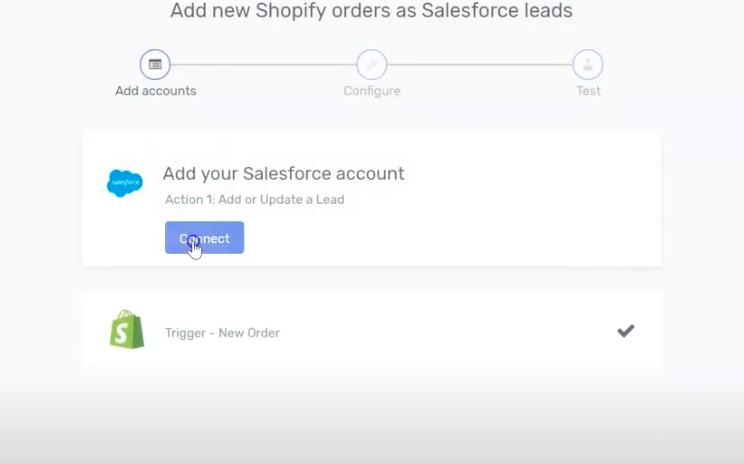
Hit ‘Connect’ and add required information and press ‘authorize’.
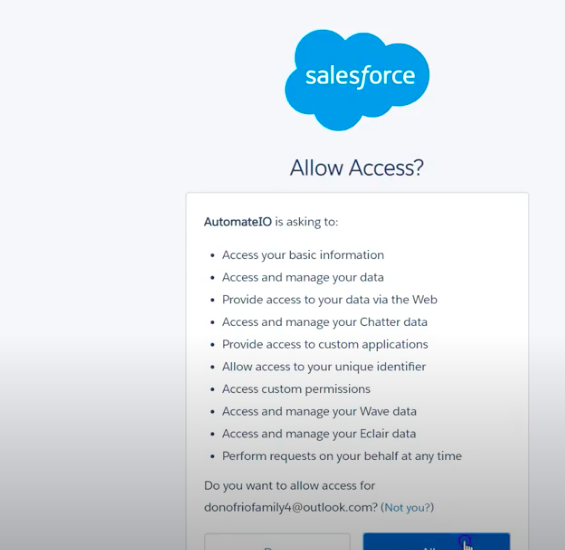
‘Allow access’ to your Salesforce account.
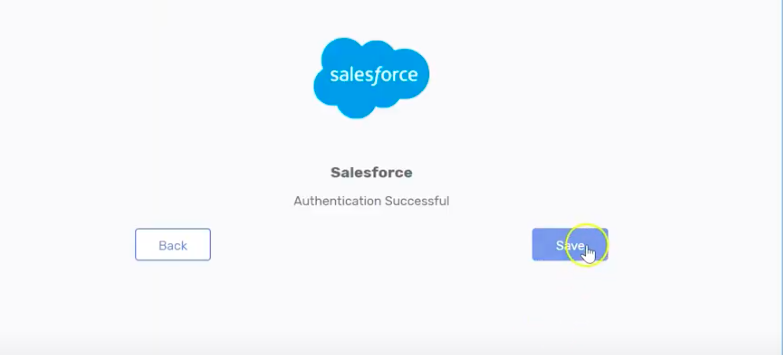
After successfully authenticating your apps, you will land on a configure page.
Data configuration of the accounts
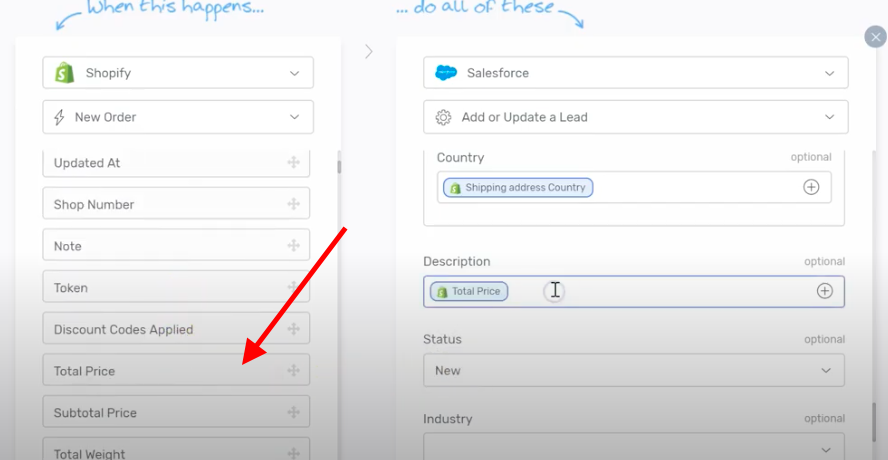
On the configure page, you can configure specific data from Shopify to Salesforce. Shopify is the trigger app whereas Salesforce is an action app.
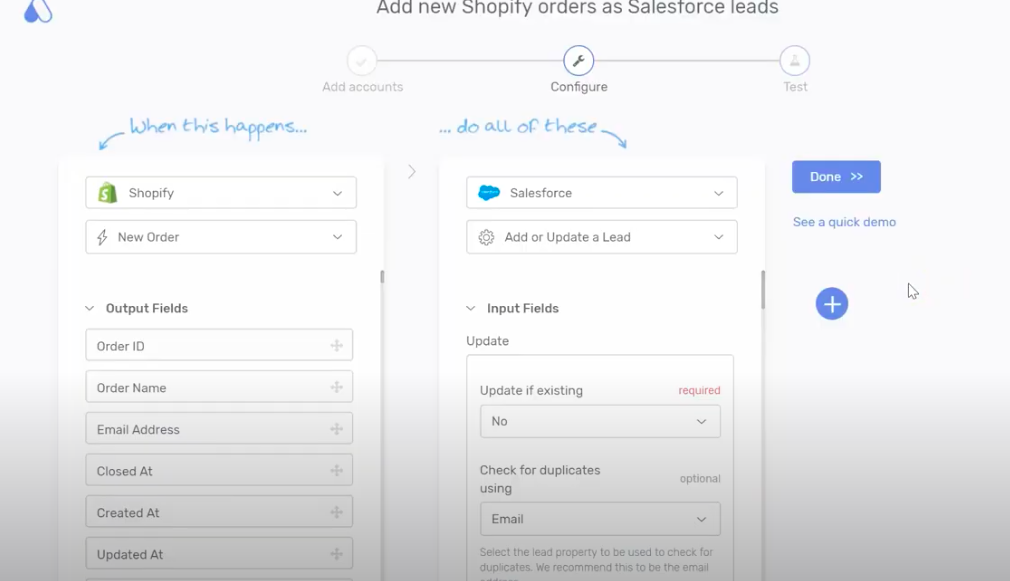
In the above screen, ‘New Order’ is selected, you can change and add any use case from the dropdown you want integration for.
Now on the Salesforce side of the above screen, we have selected ‘Add or Update a Lead’ as we want this sort of integration. Again, you can change and add any use case from the dropdown you want integration for.
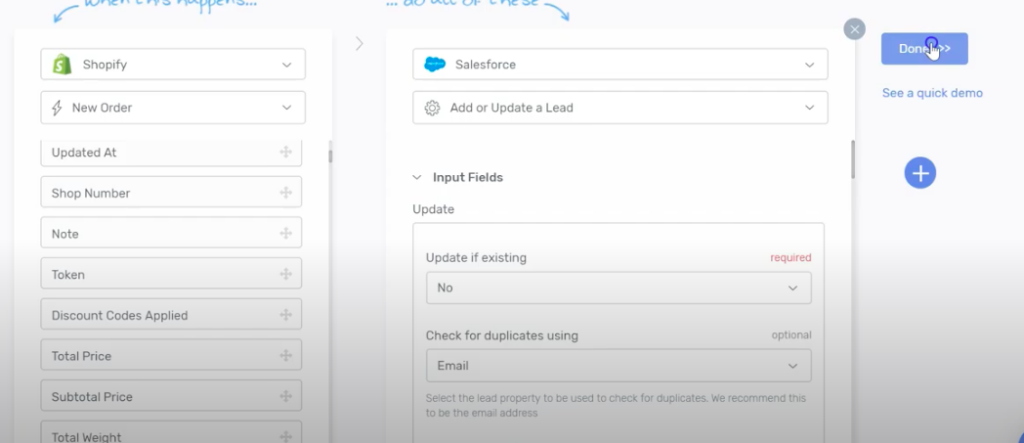
After choosing the action (we chose ‘Add or Update a Lead’), update ‘Input Fields’ especially the required ones.
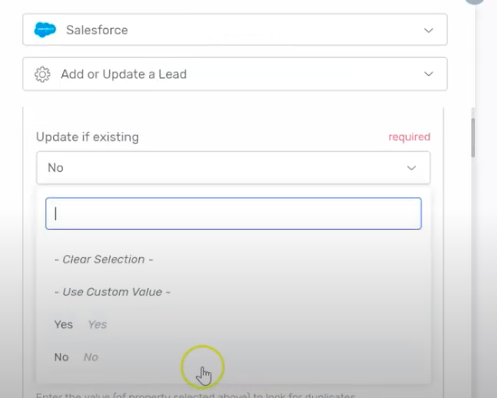
First required field is ‘Update if existing’, we selected ‘No’ for this example.
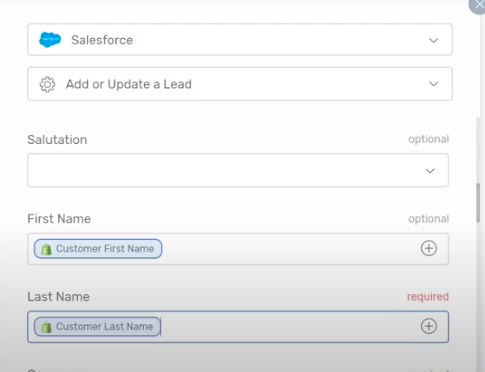
Second required field is ‘Last Name’ and we selected ‘Customer Last Name’.
Next comes the company field, select ‘ Shipping address company’.
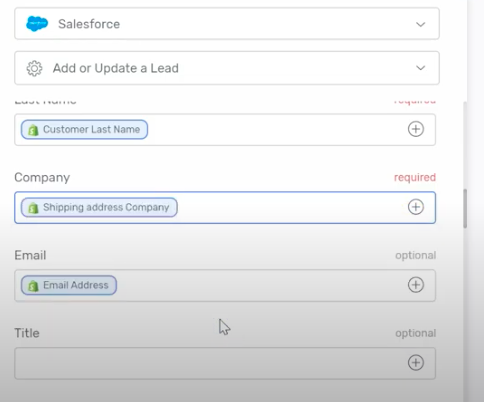
You can add any data from Shopify to Salesforce. For example, add ‘Total price’ to description for the order for more visibility.
Just drag and drop.
Once you have added all the fields, click ‘done’ button on the right side of the screen.
Test new order in Shopify
The purpose of this step is to check if our bot works the way we want or not. After you done configuring the data, you will automatically be directed to test screen.
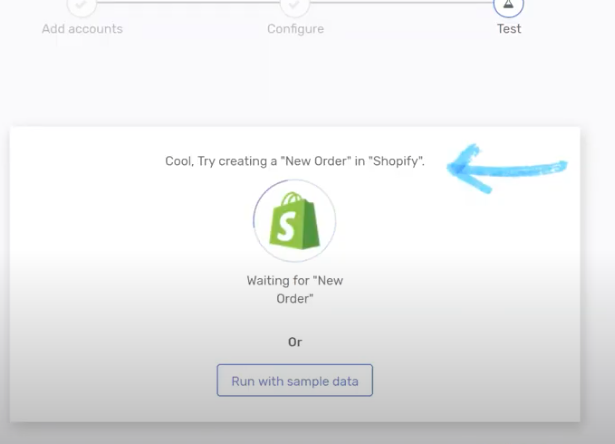
We recommend creating a new order in Shopify and see if the bot is working fine. If it works fine, you will be shown this screen.

Final Verdict
With this template of Salesforce integration with Shopify, every new order in Shopify store will be created as lead in Salesforce.You can easily map data of customers in relevant fields of Salesforce account like email, discounts etc. This way your communication with customers and overall data tracking would become effective. You just sit back and let the automation work for you.
Phaedra Solutions develops and manages ecommerce storefronts for businesses like yours, and empowers them with technical and digital solutions.
We believe anyone can dominate an ecommerce niche, product, segment or category with the right set of skills , product research, and technical setup.
Get in touch with us to learn how we can do this for you.


